Thursday, June 14, 2012

Chaos Castle Pt. 2 - Basing and further building

Now that I've got a structure to work with I can move on to basing. What you make your base from will very much depend on what you're looking for. In keeping with the recycling theme I'm making a cardboard base, but not just because I want to recycle as much as possible - it's also a great base as it is stiff, light, strong and best of all free. You could use foam board (delicate but very light), MDF/masonite/chipboard (strong but heavy but not ideal for putting on top of other terrain) or in fact any other fairly thin material that you like. Another reason why I like using cardboard is because it stands up to knocks/bumps and falls better than any other material and you can shape it easily using a modelling knife, bread knife, retractable knife, shears etc. This makes it a very flexible material - did I mention it's free also?

One thing to bear in mind is this - the bigger the base the thicker it needs to be. In the case of this castle the base will be around 75cm (2.5') in width and around 90cm (3') in depth. This means that it is in no way suitable to use only a single layer of cardboard as it would flex/bend too easily and wouldn't be sturdy enough. To make a solid base I'm going to use 3 layers in a lattice pattern. This makes it extra strong, in fact many times stronger than a single piece of cardboard as thick as the 3 layers of the cardboard I'm using combined.


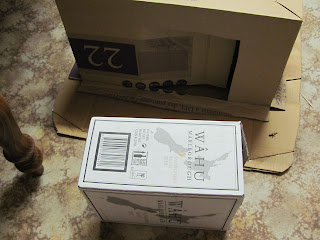
Above: I'm using some pretty big boxes made from thick card to make this base - leftovers of some electrical items that I bought.

Below: When I say to lay it in a lattice pattern I mean that you should alternate the direction of each layer when you glue them together. You can see the 'grain' of the corrugated cardboard runs in two directions. In corrugated cardboard the outside layers sandwich a centre layer of 'wavy' (re: corrugated) card that gives it strength and protects whatever it is packaging/carrying. The idea is to layer them in opposite directions for each new layer, increasing strength in all directions and making it less prone to bending/flexing. The more layers you add in a lattice formation the stronger it gets, in this case 3 layers will be plenty. Obviously the bigger the base the more layers you'll need (for most small items [i.e. less than 50 x 50cm {}] two layers is plenty).


Above: 2 layers of corrugated cardboard in a lattice configuration.

Below: When gluing layers together use PVA glue, it doesn't matter what brand as they're all the same (regardless of what anyone tells you), what matters is that you use plenty and get good coverage of the two surfaces being glued together. TIP - When you glue cardboard together push them on to each other and then rub the 2 layers together, this will distribute the glue across both surfaces evenly and fill all the cracks, helping it adhere better. It also helps stop big blobs of PVA from forming, which makes it cure faster.


Above:
Once you've glued the two layers together put some evenly distributed weight on top. This will make the final bond between them that much stronger and more consistent.

Below: The third layer isn't a full layer per se. Instead, I'm using 3 off large off cuts as stiffening boards. Again I've used plenty of glue, put them in a lattice formation, placed some evenly distributed weight on top and given them a few hours to dry.


Below: You don't have to do this but I like to, particular on cardboard bases of this size. After poking two holes in the base I've used a twist tie (most often found on bread bags and new electric cables) and pushed it through each hole. Once done you simple twist it off until it's tight and then move on to the next hole. This may seem like overkill but I like doing this on bigger bases, by no means do you have to do the same.


Above and Below:
All tied off. I used 5 ties, though I would've used 6 if I didn't run out. Again this isn't strictly necessary, I just like to make sure.


Above: Once the base is all dry and ready to go it's time to mark out where it's going to be cut. When cutting the edge try to cut it at about a 15 degree angle - this makes it slope off so that it looks better on the battlefield and doesn't come to an abrupt 90 degree angle.

Below: Cutting the base. You can use a bread/modelling/retractable knife, but always make sure that you're cutting away from yourself and take it slowly. Slipping and cutting yourself is not pleasant.


Above: The cut and finished base, all ready to have the castle glued to it.

Below: The foam walls, glued to to the base. It takes a lot longer for glue to cure when gluing foam and cardboard together. Also, be very wary using anything other than PVA (craft glue) on foam - most other glues either won't bond strongly enough, or they'll melt the foam. If in doubt, test it on a scrap piece first. You can see I've also glued the carved off pieces of foam to make the buttresses match. Don't worry about any small gaps as they'll be covered over with filler.


Above: The boxes are going to form the base of a rocky outcrop, on the front of which will be a portal.

Below: I cut a slot in the back of the bigger box, so that I could wedge the smaller box into it. This also makes it a lot stronger, particularly since I glued, stapled and taped it all together.


Below: Using a utility knife I cut lots of nicks/wedges/holes in the sides of the boxes, so that filler, rocks and other items I add aren't the only depth it's given. This also draws attention away from the fact that the rocky outcrop is, in fact, boxes.


Up next - texture, the portal, adding detail and generally making the castle look pretty EEEeeeevil!

Wednesday, June 13, 2012

A Quarrel Too Far

Well, it certainly has been a long time between posts! In the interim I've been busy attending to a great many things, and generally just being a happy go lucky scamp. Also, this is another tangential post, but I will come back to the castle soon (it's been sitting for a while, but much progress has been made).

Anyway, to the post!

I haven't mentioned it before, but I'm a big fan of archery. When I was fourteen years old I got my first bow - a Hoyt compound with a 40lb draw weight at 26". I loved it - it was deadly accurate, hi-tech and great to learn with. Half a year later on a lovely Saturday afternoon I was down at my archery club when an older gentleman showed up on the field. Everyone there was firing modern recurves and compounds, and being that I live in Australia that's about all you could get in the 1990's. Anyway, the gentleman in question moved to the 20 metre target butt and pulled out a longbow. Magyar bows and the like were lovely and amazingly crafted, but the longbow was something I'd grown up reading about. Most of my favourite stories had featured at least one character that utilised this deadly weapon to great effect, and I always saw it as a sinuous, elegant item of weaponry.

Anyway, I went over to chat to the gentleman as he set his equipment up. He was a lovely man and was more than happy to share what he knew. He had a leather quiver, wooden arrows and a lowish strength (35lb) longbow, but I was instantly smitten. Despite no one else taking any interest, I stood and watched him, chatted with him and that was it - I had to have a longbow.

Quite a few years later I finally got around to having my very own. The moment I laid eyes upon it I loved how beautifully simple it was, at which point my girlfriend (now fiancé) decided that she really wanted a bow of her own. As I like to make all my own arrows I figured that I'd make a particularly detailed set heavy ash arrows for my bow as well as a set of light, softwood arrows for her along with matching quivers. Aluminium/carbon fibre arrows are accurate and cheaper, but building wooden arrows involves so much more; a mix of science and art. Below are the results.

On the left is my quiver - a back quiver that holds over a dozen shafts, with a cutout on the back that is ideal for quietly taking out an arrow (as you don't have to go pulling one out the top of the quiver, in the process scaring off your target by flailing your arms about in the air). Rabbit fur lines the top, with 2mm leather wrapped around a PVC tube lined with fleece (to keep the arrows quiet and protected) and hand laced with black thong. I used my awl to sew in a slot for a file (to keep broadheads and knives sharpened) and a pouch for my favourite knife.


The shafts are ash and have been hand tapered, crested, stained, varnished, tipped and have hand cut turkey feathers that are bound to the shaft with waxed cotton. I'm proud to say they're the finest arrows I've ever made and are quite heavy. I did cheat a little by using plastic nocks, but as carved nocks break quite easily it was a very practical concession. I had to build a new target butt for these arrows, as they punched through my old one (which was 25cm deep and backed in 8mm MDF) and the two fence palings behind it aswell. Needless to say I was very impressed with them, particularly since they're spined for a 50-55lb bow (mid-heavy weight), though I am perhaps a bit too careful with them as I'm loathe to take a risky shot for fear of one of them breaking.

On the right is the hip quiver I made for the 25lb recurve bow, which is 3mm cow hide lined with wolf fur from a old vest I was offered when my mum was spring cleaning. The arrows are very light to match the bow, and have been hand dipped, crested and varnished. The fletches are standard 3" feather fletchings from my local archery store, and I hand painted roman numerals on to each one so that she could keep track of her favourite (re straightest shooting) shafts for crucial shots. I still have to attach straps so it hangs from a belt, but otherwise it's finished.