The method I use to make larger hills and the like involves cutting up many pieces of thick cardboard into a manageable size (100 x 50mm [4" x 2"] roughly), slathering them in PVA and putting them together in a 'lattice' layout. Layering them in this manner makes for flexibility, strength (basic engineering at work here) and simplicity. You could just cut out the cardboard in the shape of the hill and layer them that way but I find that this method is faster, easier, stronger and uses less card. It's entirely up to you though.

Below: This shows the layers of the hill being glued in place. Add layer upon layer until you're happy and make sure that you use plenty of glue and give it time to dry (overnight is perfect). Oh and yes, that is a big (real!) rock on one end of the hill. I only used PVA and a little filler to hold it in place, simple.


Below: To get a nice finish on top I put a large piece of card. This isn't necessary but I wanted a nice, smooth platform which only needed a skim coat of filler.

Below: An example of what happens when you put on filler too thick. You can fix this fairly easily by putting on a skim coat to fill the cracks but try to avoid it where possible as it can make it more prone to dislodge and flake off.

Below: The completed boards, all ready to be undercoated. Remember to give your boards plenty of time to dry before undercoating.


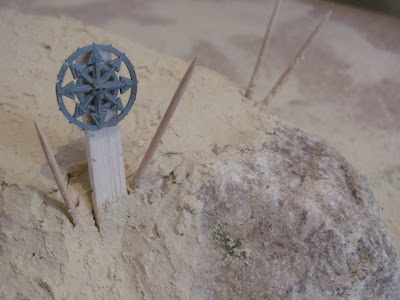
Below: The pikes were made from bamboo skewers and the altar is a piece of balsa wood cut, slashed and chipped randomly (using a modelling knife) with a Chaos standard taken from my bits box (which was also cut/slashed with the knife).
SAFETY NOTE: Be careful when using a modelling knife and make sure you're cutting AWAY from yourself, where possible cutting on to a chopping board, modelling mat, used thick magazine or similar. You're going to cut yourself eventually - the skill is in making sure you don't cut yourself seriously.

Below: The undercoated board, ready to go.

Below: The completed board ready to have detail added. The skeleton was painted using Bleached Bone and final highlights of white.

Below: All done. The skeleton had some Chestnut/Flesh wash applied, supplemented by a few select splotches of a mix of Blood Red, Crimson and Chestnut wash highlighted with straight Blood Red. To get the clotted blood effect on the altar I applied the same mix really thick and applied a couple of coats, making sure there was enough to form a couple of drips. The Chaos symbol on the rock used the same mix again with a touch of Purple to give it a magic/surreal effect.


Below: I painted some foot/knee/hand prints on the right to show someone who tried to get away whilst bleeding heavily.

Again this board cost less than $10 to make (excluding the skeleton and Chaos symbol).
Cheers!
No comments:
Post a Comment